Laravel deployment
Project Extraction
-
First you have to extract the
nlytical.zipthen you will get three zip files.- Nlytical-laravel.zip
- Nlytical-admin.zip
- Nlytical-web.zip (if you have website version)
- Nlytical-app.zip (if you have application version)
-
Create
nlytical_laravelfolder with below commandmkdir -p /var/www/nlytical_laravel -
Upload
Nlytical-laravel.zipto a location where you want to deploy Project using FileZilla/var/www/nlytical_laravel(This is the recommended location)
-
Change ownership of the folder to current user
chown -R www-data:www-data /var/www/nlytical_laravel -
Install unzip to
unzipthe Project . Run following command to install unzipsudo apt install unzip -
extract the
Nlytical-laravel.zipunzip Nlytical-laravel.zip
Configurations
- After the extraction you will see the Project files
Configure Environment Variables
-
Edit the
.envfile in the root directory of your project. This step is mandatory to ensure the application can connect to your database. -
Update the following lines in the
.envfile with your actual server and database credentials:APP_URL=http://{your_server_ip}
DB_DATABASE={your_database_name}
DB_USERNAME={your_database_username}
DB_PASSWORD={your_database_password}
Clear Configuration Caches
-
Before running migrations, clear all cached configurations using the following Artisan commands:
php artisan config:clear
php artisan cache:clear
php artisan route:clear
php artisan view:clear

php artisan optimize
Database Migration
- Below command used to manage your database schema using migration files.:
php artisan migrate
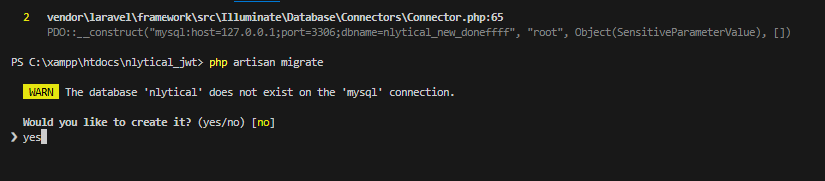
- During the installation process, you may be prompted with configuration options. Answer "yes" to all questions.
- Once installed all tabales in database then you can run below command to serve installation process.
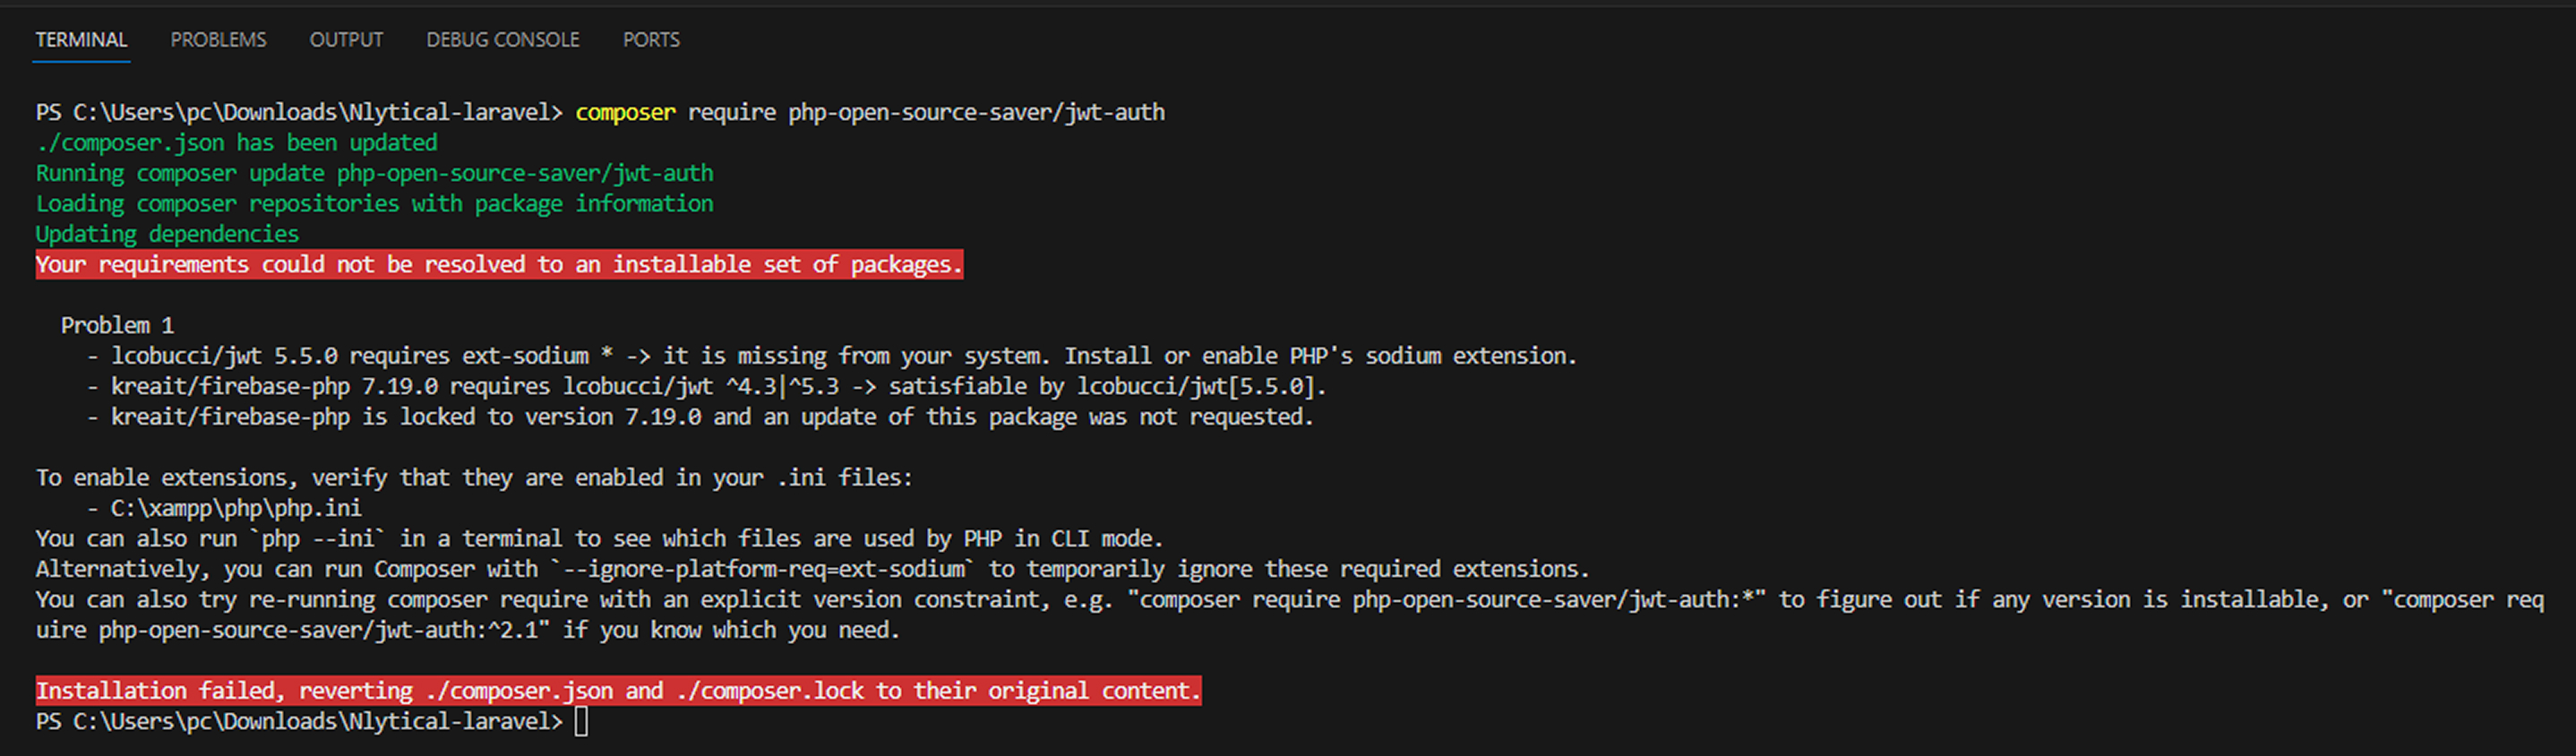
Install JWT Auth
- JWT Auth is required for API authentication. Install it by running:
composer require php-open-source-saver/jwt-auth
-
Notes: The error you're facing is due to the missing ext-sodium PHP extension after run above command, which is required by lcobucci/jwt (used by kreait/firebase-php for JWT handling). Here's how to fix it:
Edit php.ini
- Open the PHP configuration file in your preferred editor. Replace phpX.Y with your PHP version (e.g., php8.2):
sudo nano /etc/php/X.Y/apache2/php.ini -
Search for the following line:
;extension=sodium- Uncomment it by removing the semicolon:
extension=sodium- Restart Apache
sudo systemctl restart apache2
Generate JWT Secret Key
To generate a unique JWT secret key and automatically add it to your .env file, run the following command in your project root:
php artisan jwt:secret
Start Development Server
- To start the development server, run the following command:
php artisan serve
Start production server
To Serve our project you have to edit apache virtualhost file.
- Open default virtualhost file.
sudo nano /etc/apache2/sites-available/000-default.conf
- Replace existing Directory and DocumentRoot with below ones.
  ServerAdmin webmaster@localhost
  ServerName your_server_ip

  DocumentRoot /var/www/nlytical_laravel/public

  <Directory /var/www/nlytical_laravel/public>
      Options Indexes FollowSymLinks
      AllowOverride All
      Require all granted
  </Directory>

  ErrorLog ${APACHE_LOG_DIR}/error.log
  CustomLog ${APACHE_LOG_DIR}/access.log combined
-
then after enable rewrite module of apache
a2enmod rewrite- First check for any syntax error with below command.
apachectl configtest- If syntax is ok then after restart the server.
sudo systemctl restart apache2
Varification
Open below url in the web browser.
http://{your_server_ip}
-
If everything was installed correctly then you will see page like below.
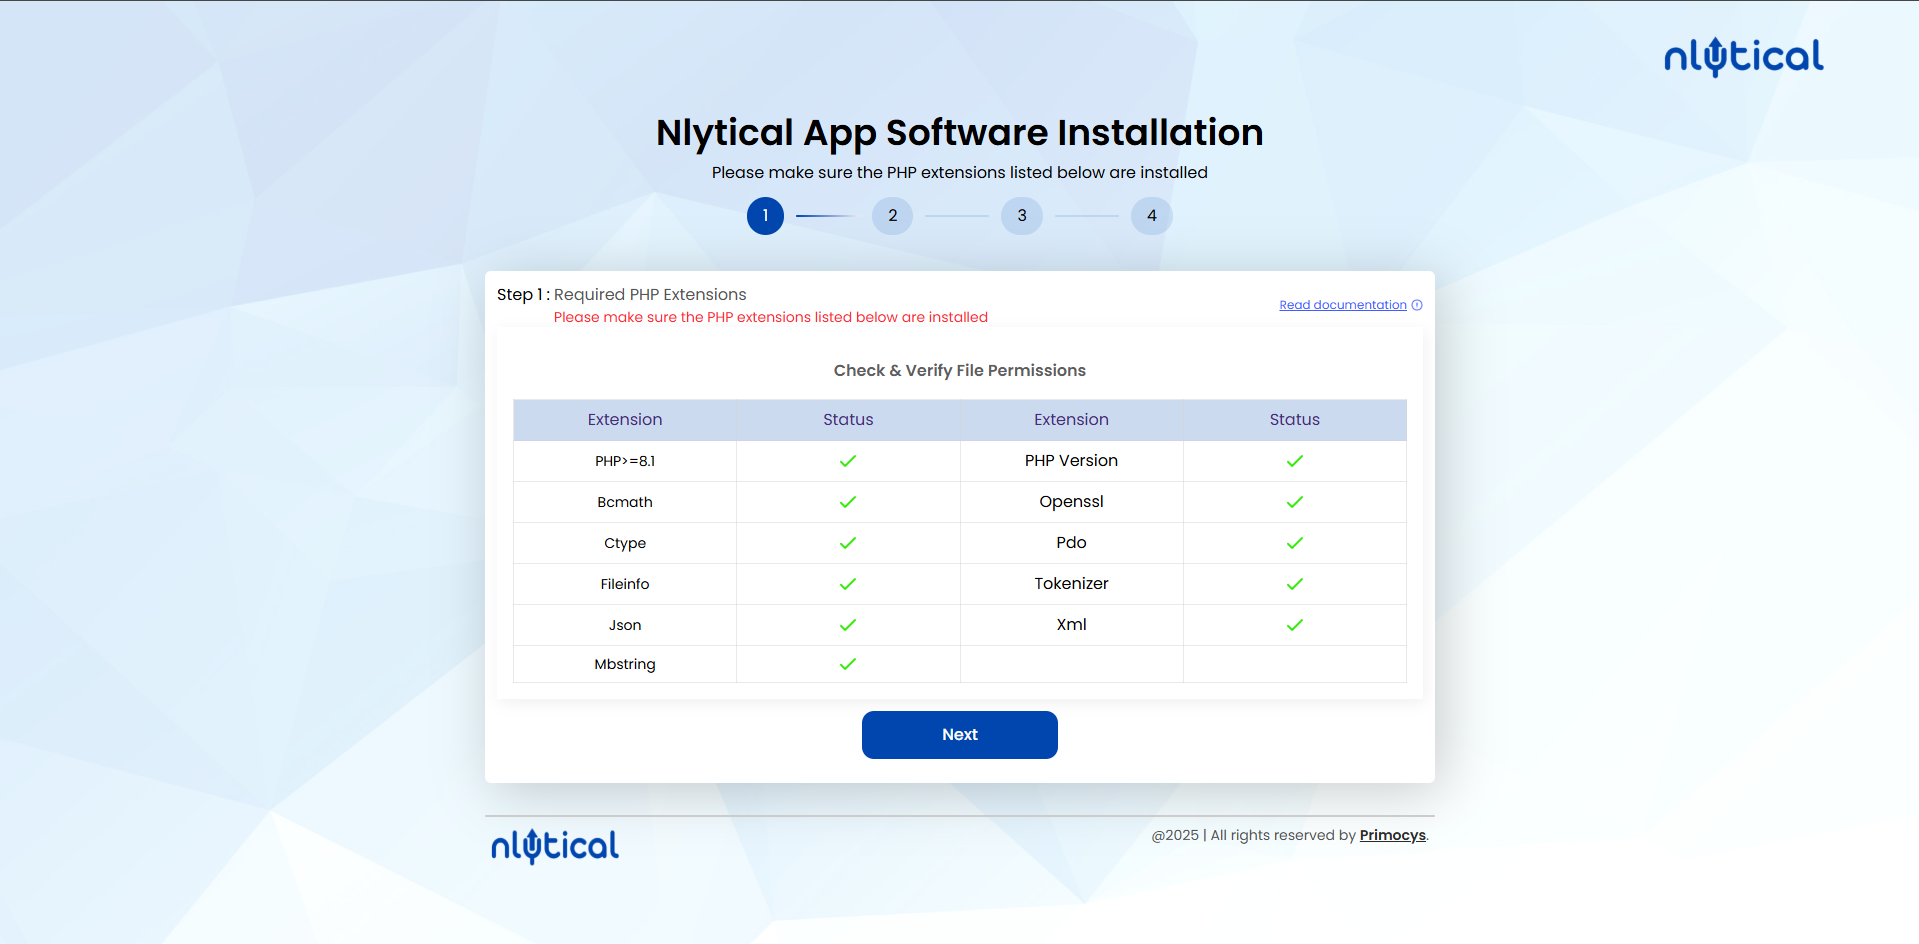
-
Requirements PHP Extensions.
-
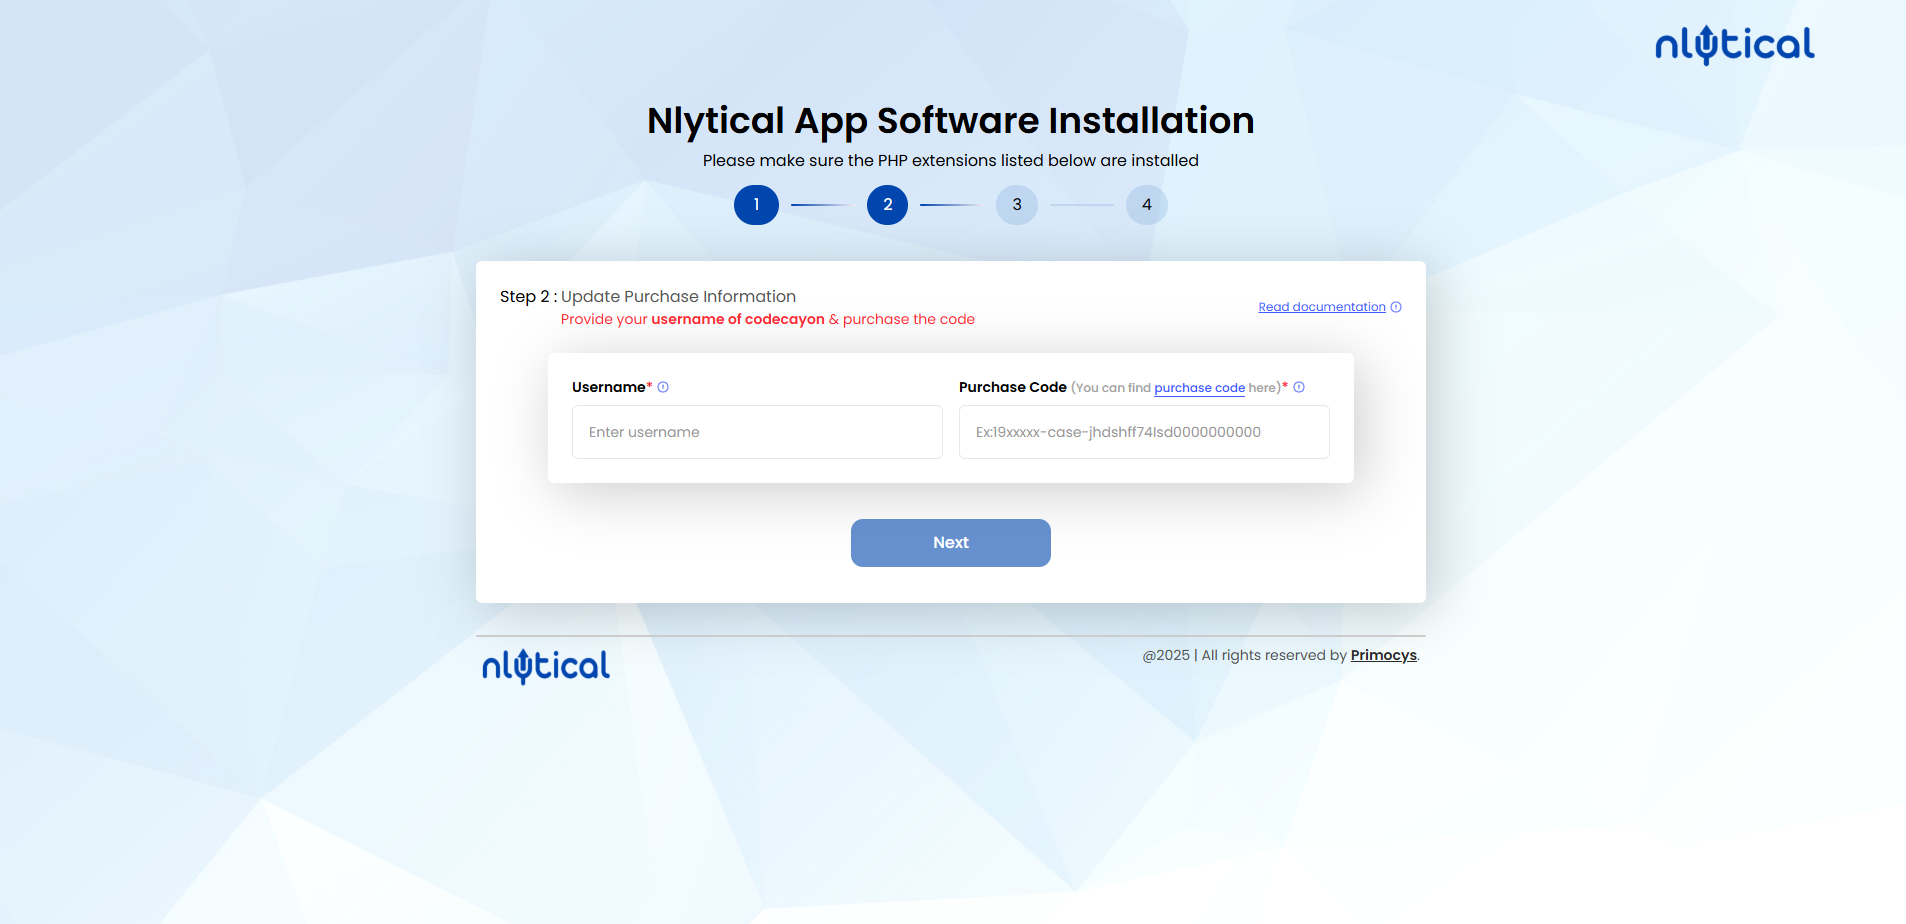
In here you have to enter envato
Usernameandpurchase code.Purchase codeYou can only use this purchase code one time.
-
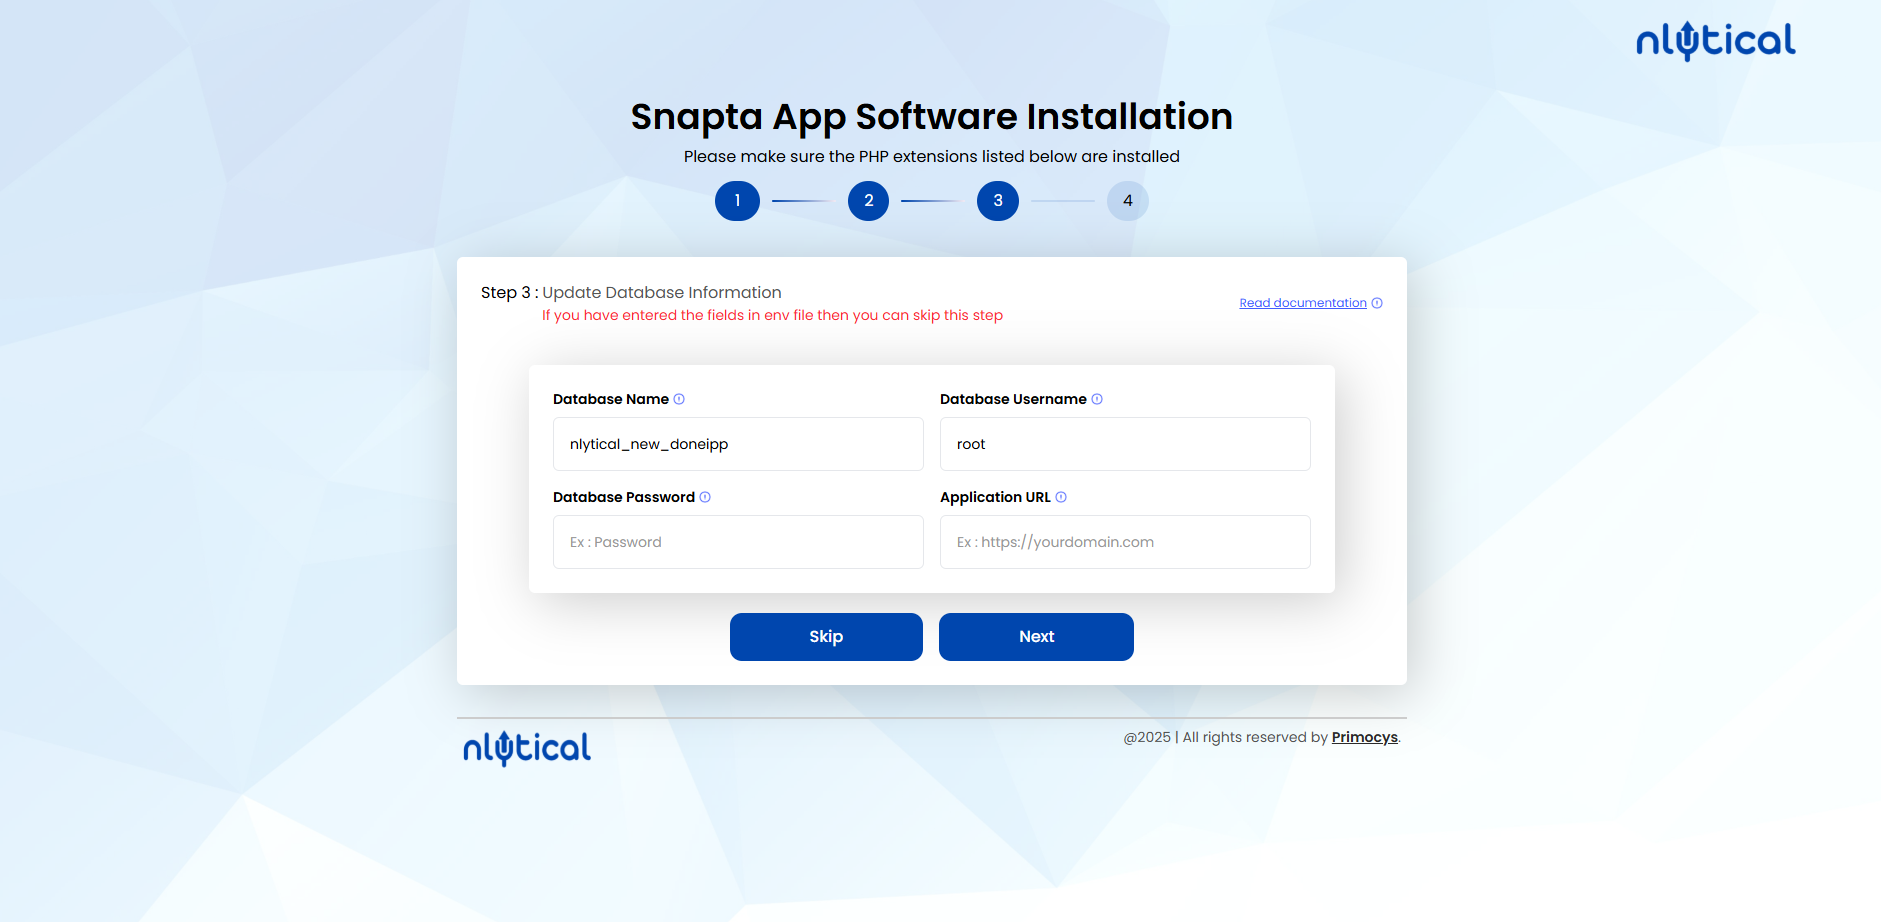
Third steps is for database configuration.
-
Provide a Database name which you want to use for this nlytical (That Database must not be exist before creation. That will be automatically created at runtime)
-
Provide Database Username (User which will have acces of this Database. For Security purpose Provide a totally new username for this )
-
Provide Database User's Password. This password will be used to access that database. Although Root user will have access of all the Databse which exist in It's MySQL
-
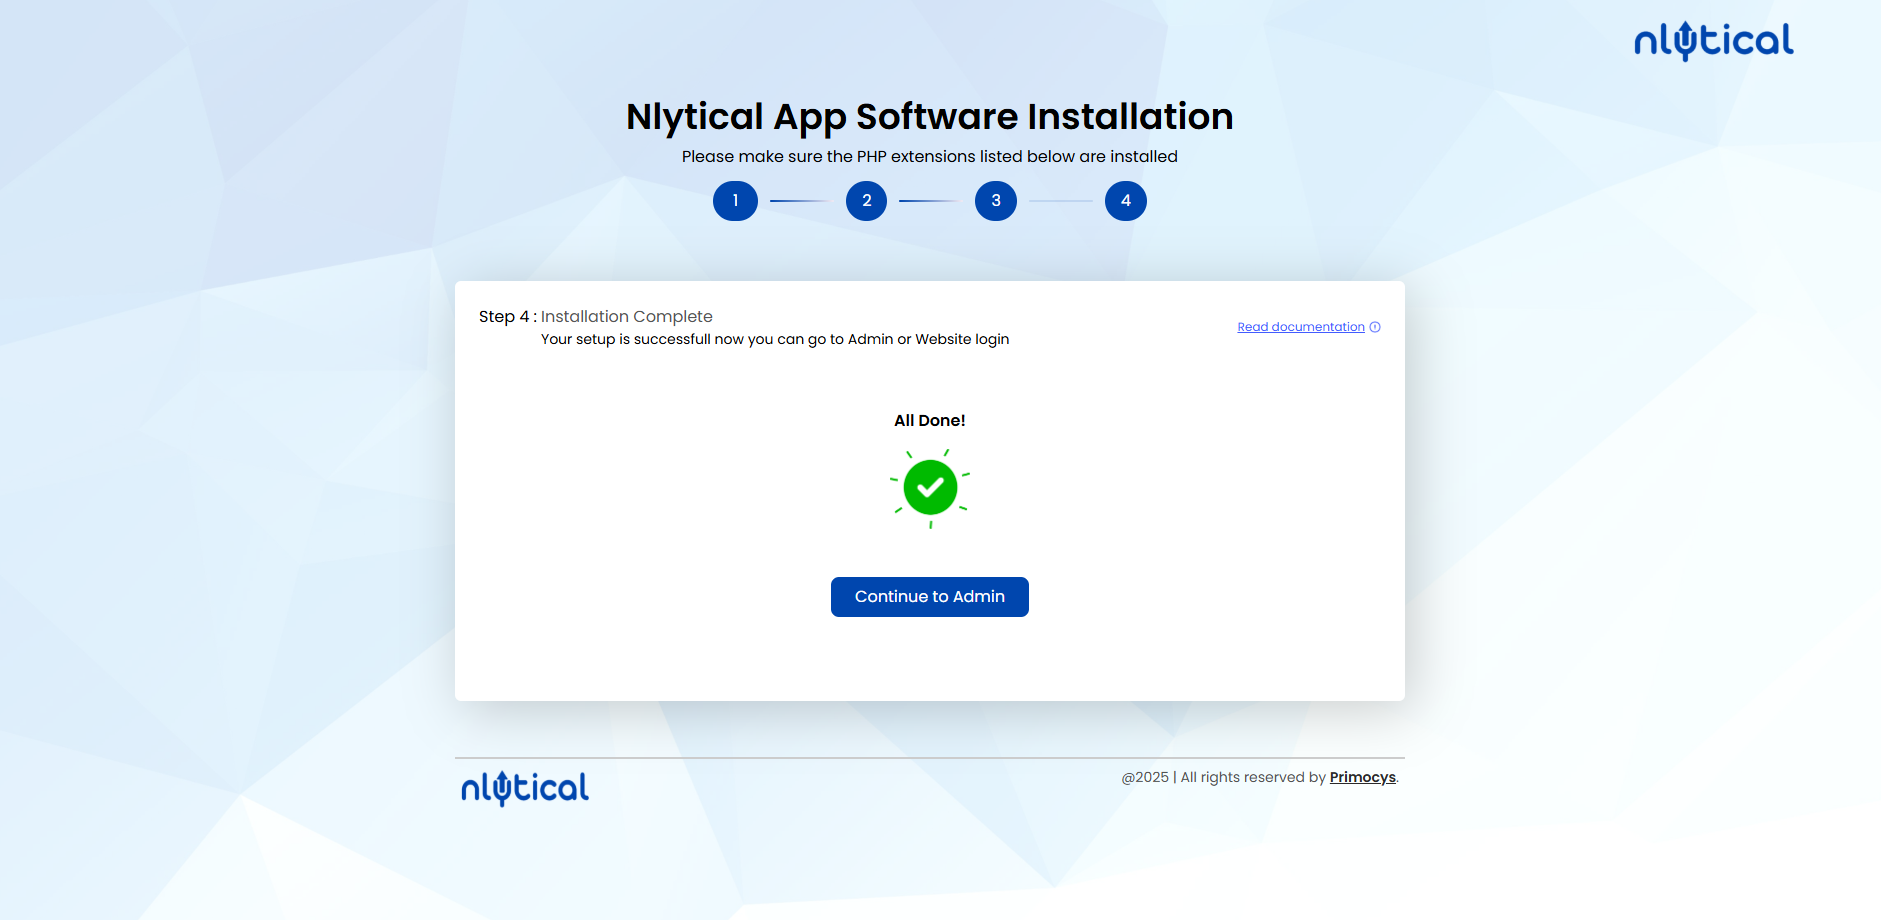
After all the installation prccess completed you will see this page.
 note
noteAfter successfully completing the manual deployment, please run
php artisan optimizein your project. This step is mandatory. Additionally, if you make any changes to the .env file, always remember to runphp artisan optimizeafterward.
-